Extending A Render Out Of The Frame
by Avalan
By far the most frequent question I get asked when I showcase my cards is "How do you get the render of [this Pokémon] to pop out of the frame?" So, here's how you do it, alongside some example images using a Trevenant render from an official card.
Requirements:
- Any photo editor app (Photopea works well as a free, in-browser option.)
Firstly, you'll want to get your render. Simple enough, you just do it like you would any other card.
Then, take your render and open it in your photo editor of choice. (See image 1)
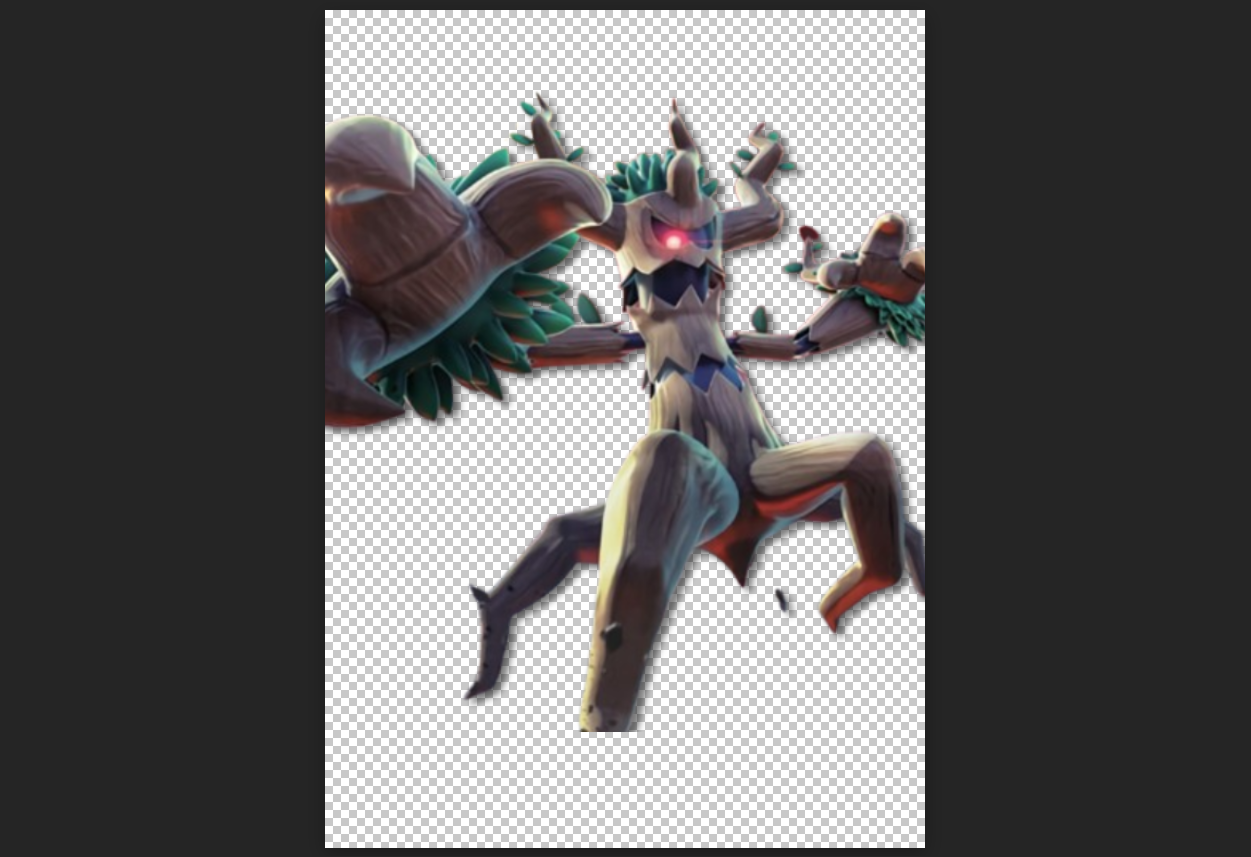
Image 1
Next, you'll want to select the "Rectangle Select" tool (It should look like a rectangle made of dotted lines in most photo editor apps). Once selected, drag your mouse across the part of the render you want to extend out of the frame. The part you select should have dotted lines on the outside. (See image 2)
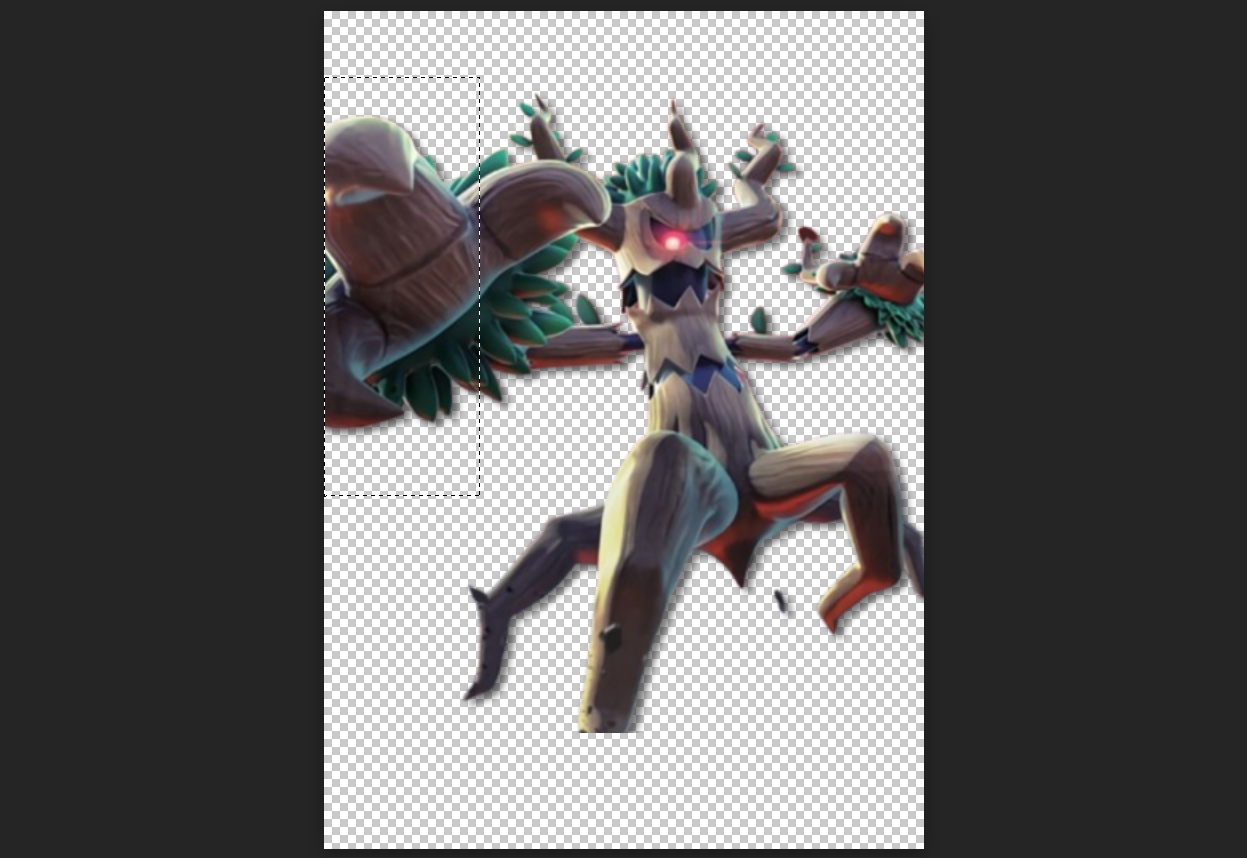
Image 2
Right click the box you just made, then select "Layer Via Copy". You should now have a second layer that is just the part you want to extend out of the frame. (See image 3)
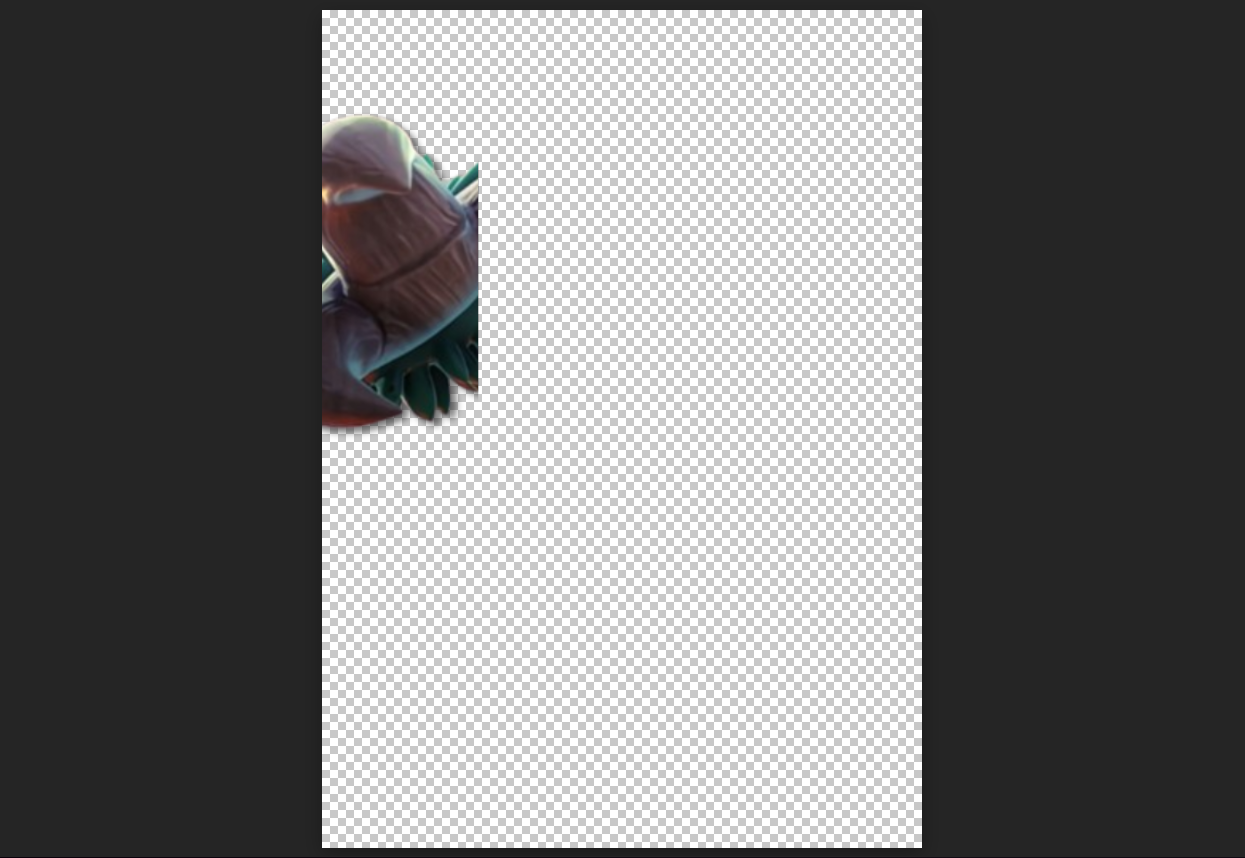
Image 3
You can turn off the visibility of the other layers by clicking on the eye icon next to each layer.
Now, once you've made it so only the extended part is visible, you'll want to select "File", then "export as". Export the image as a png file so that it retains the transparent background. (See image 4)
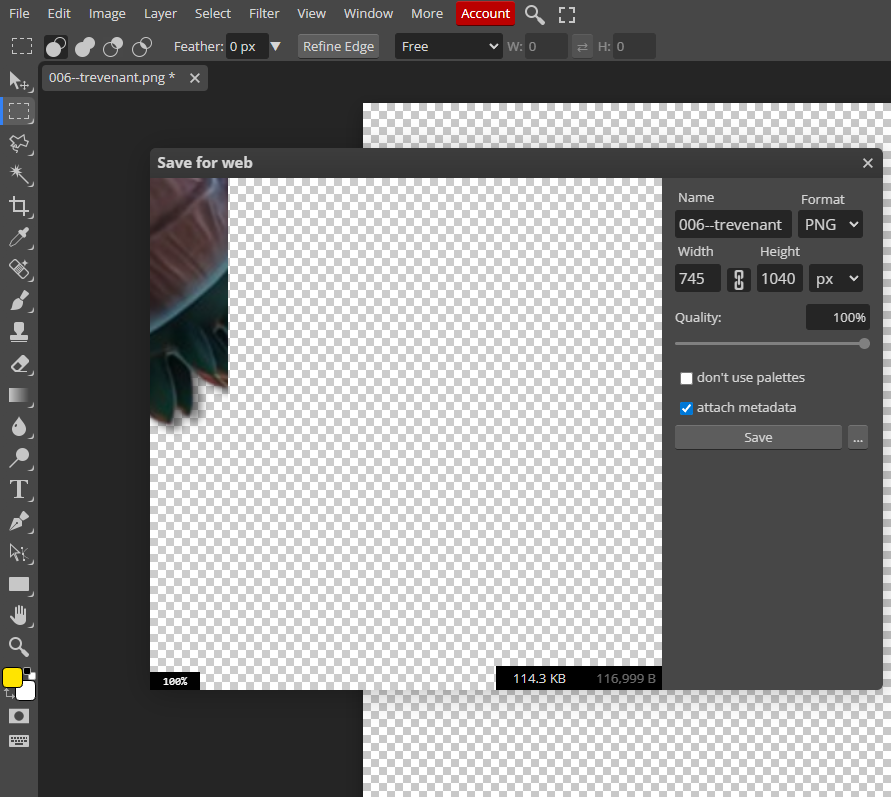
Image 4
Now that you have the part that you want to extend out of the frame, head over to pokecardmaker, insert the image you've just made alongside the original render, and give them the exact same coordinates. (See images 5 and 6)
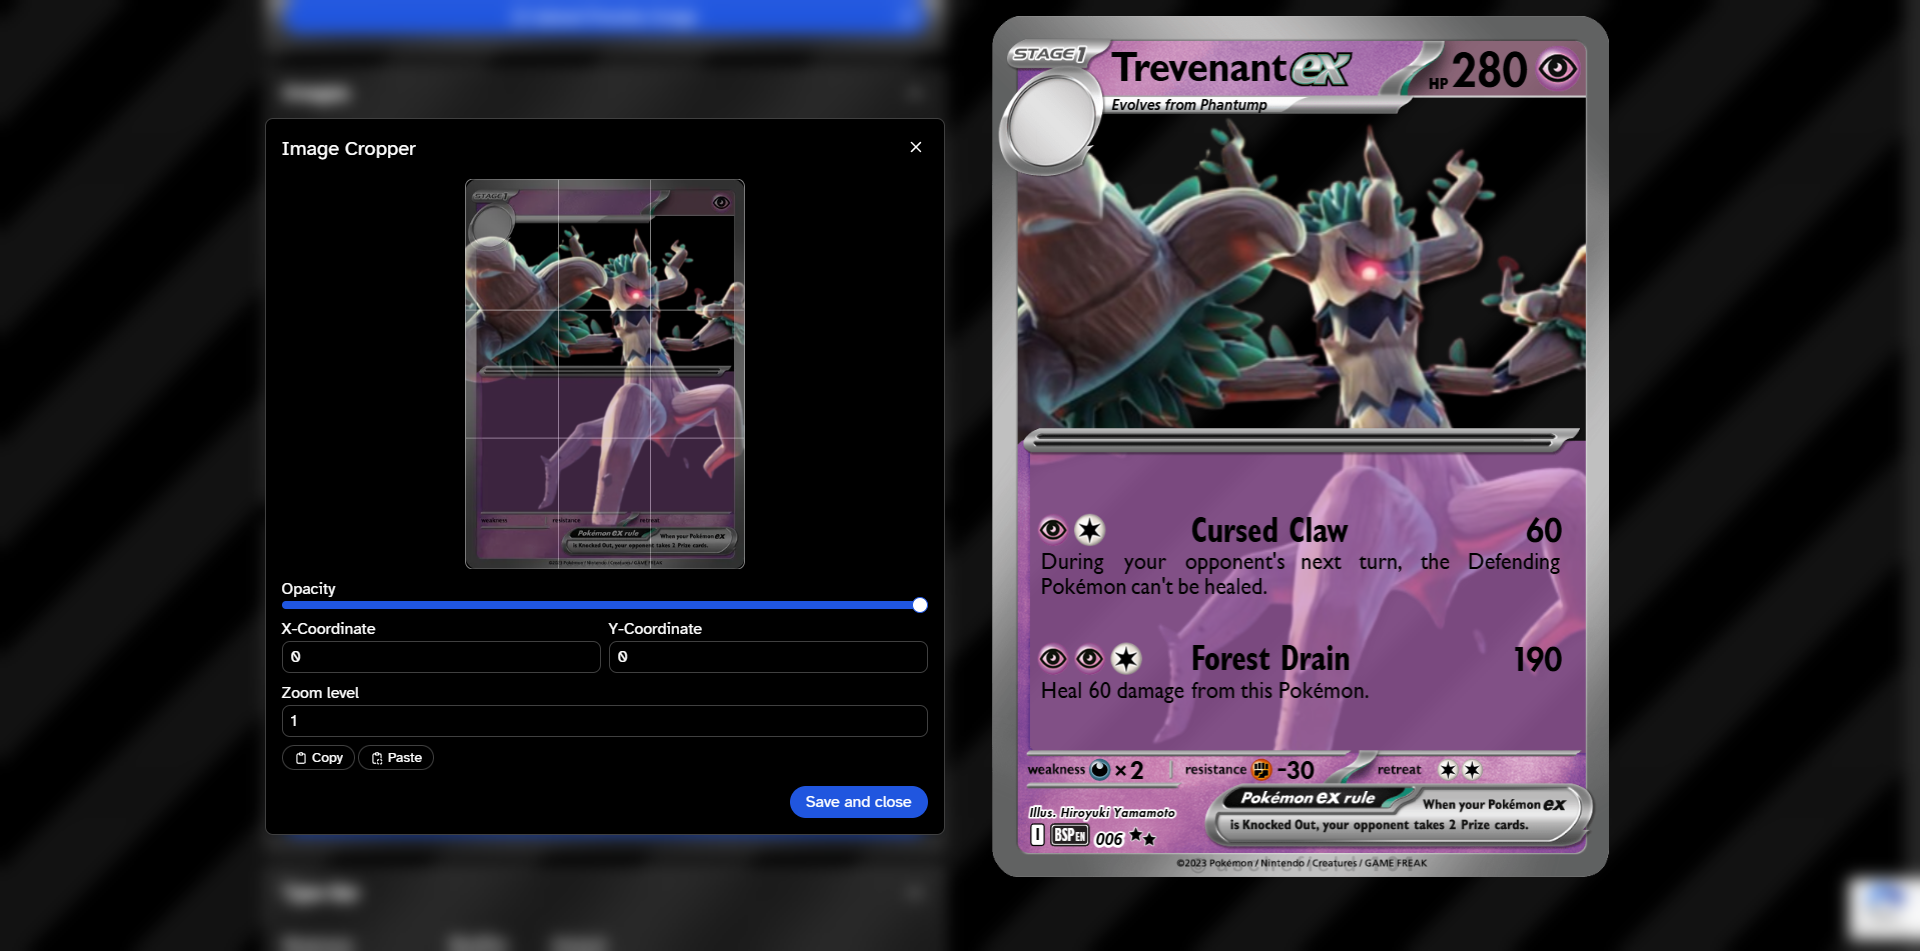
Image 5
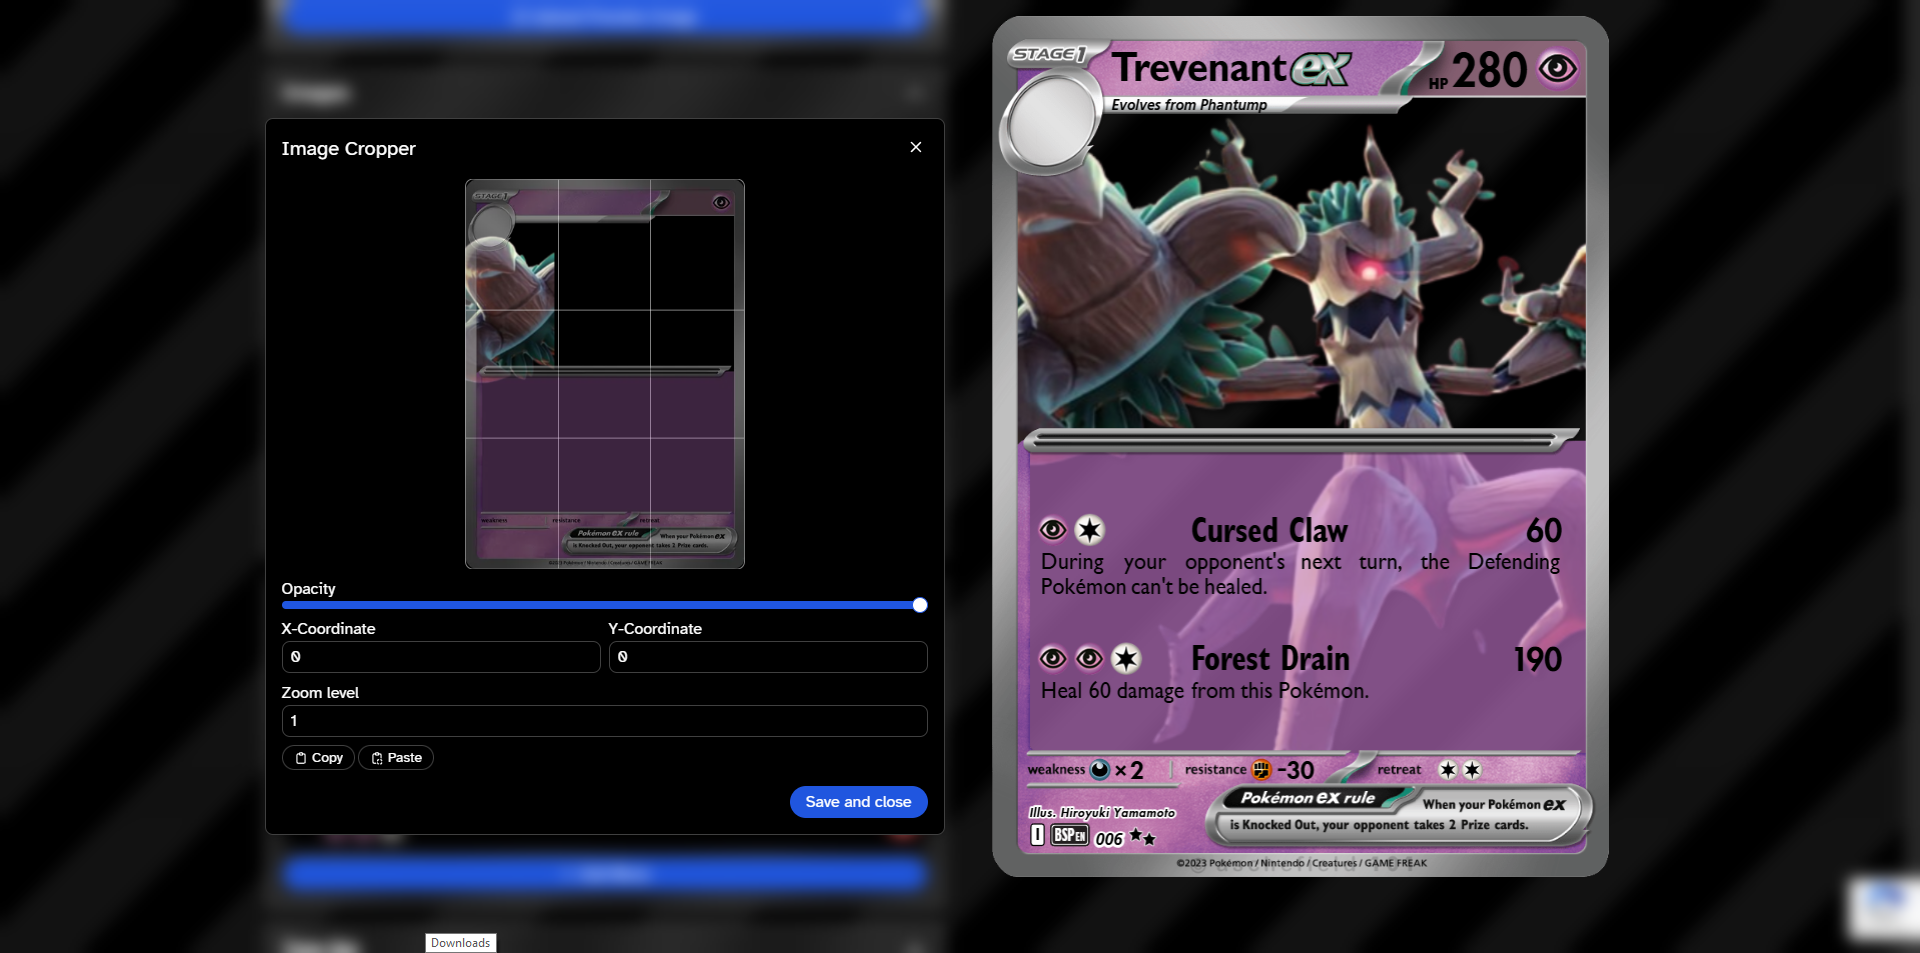
Image 6
Finally, drag the image you made down below the template image line. This will make it pop out of the card. (See image 7)
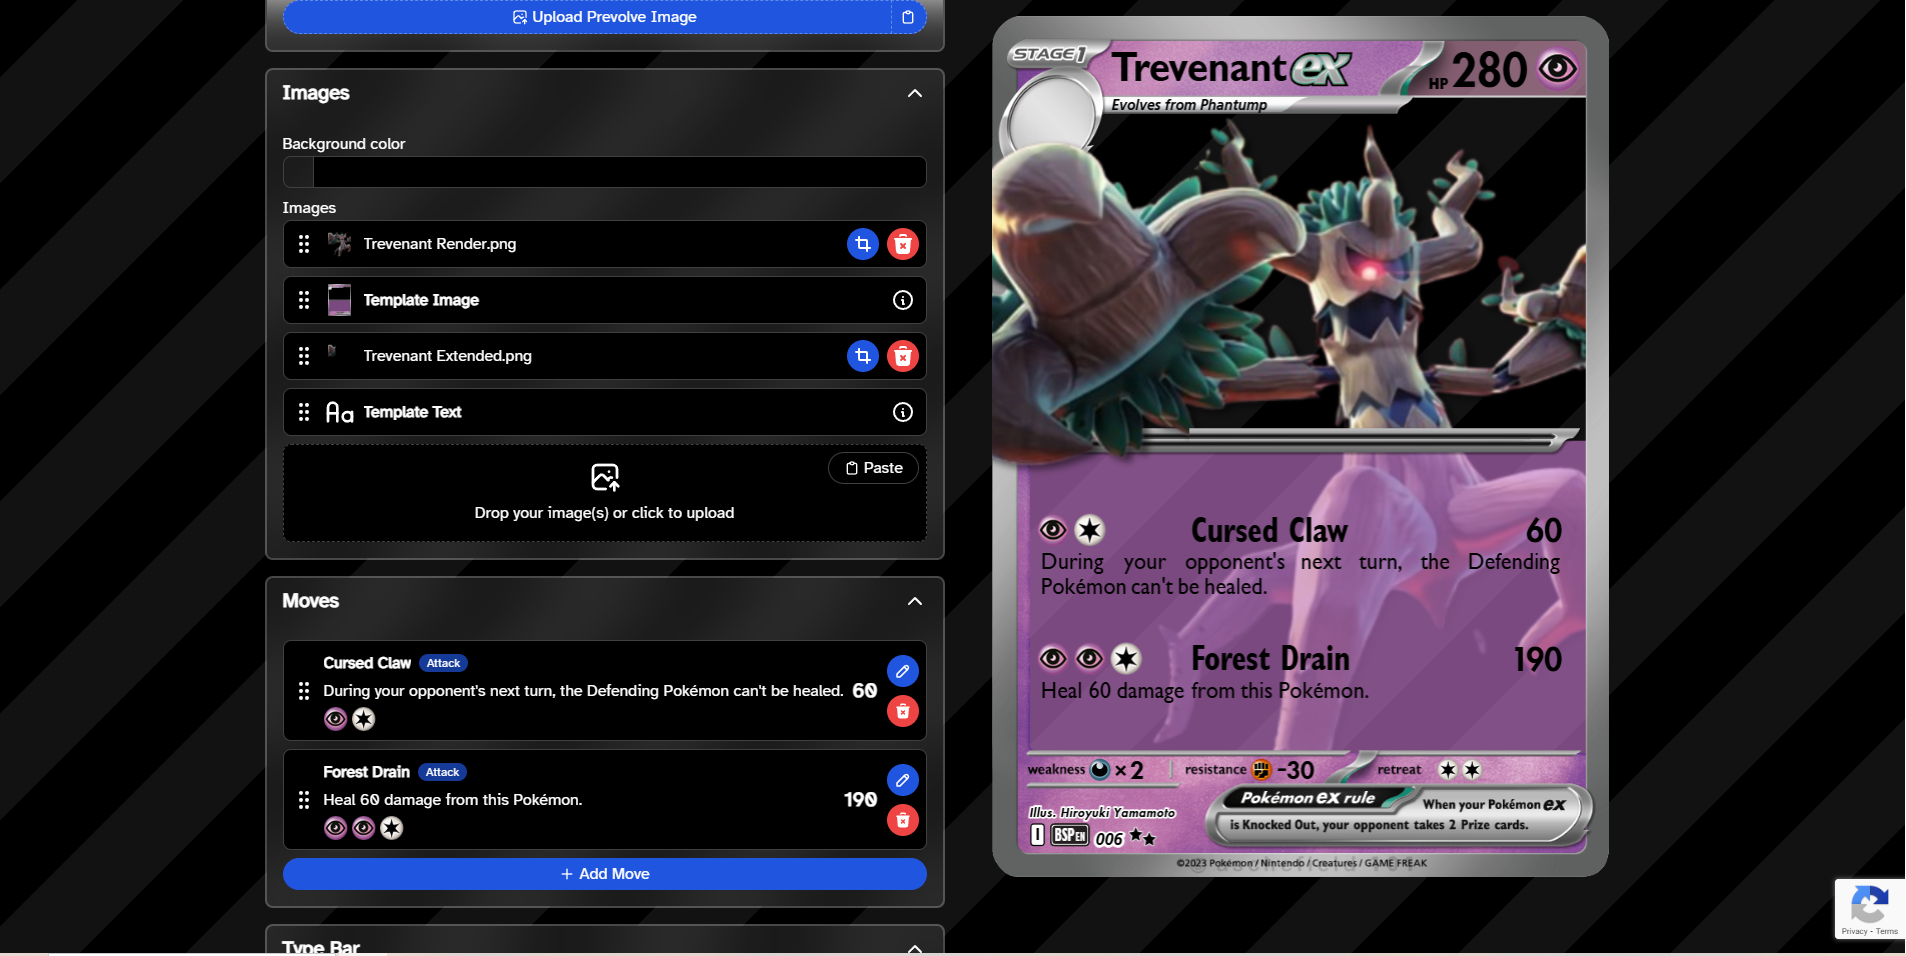
Image 7
With that, your render is now extending above the card frame!