Adding Shadows
by Avalan
Sort of an extension of the previous trick, this tutorial will help explain how to place shadows under the part of the render you extend out of the frame, using a Mega Sharpedo render as an example.
Requirements:
- Any photo editor app (Photopea works well as a free, in-browser option.)
Starting with the result from the previous render, you'll already have:
- The render itself. (See image 1)
- The cropped part of the render that extends out of the frame. (See image 2)
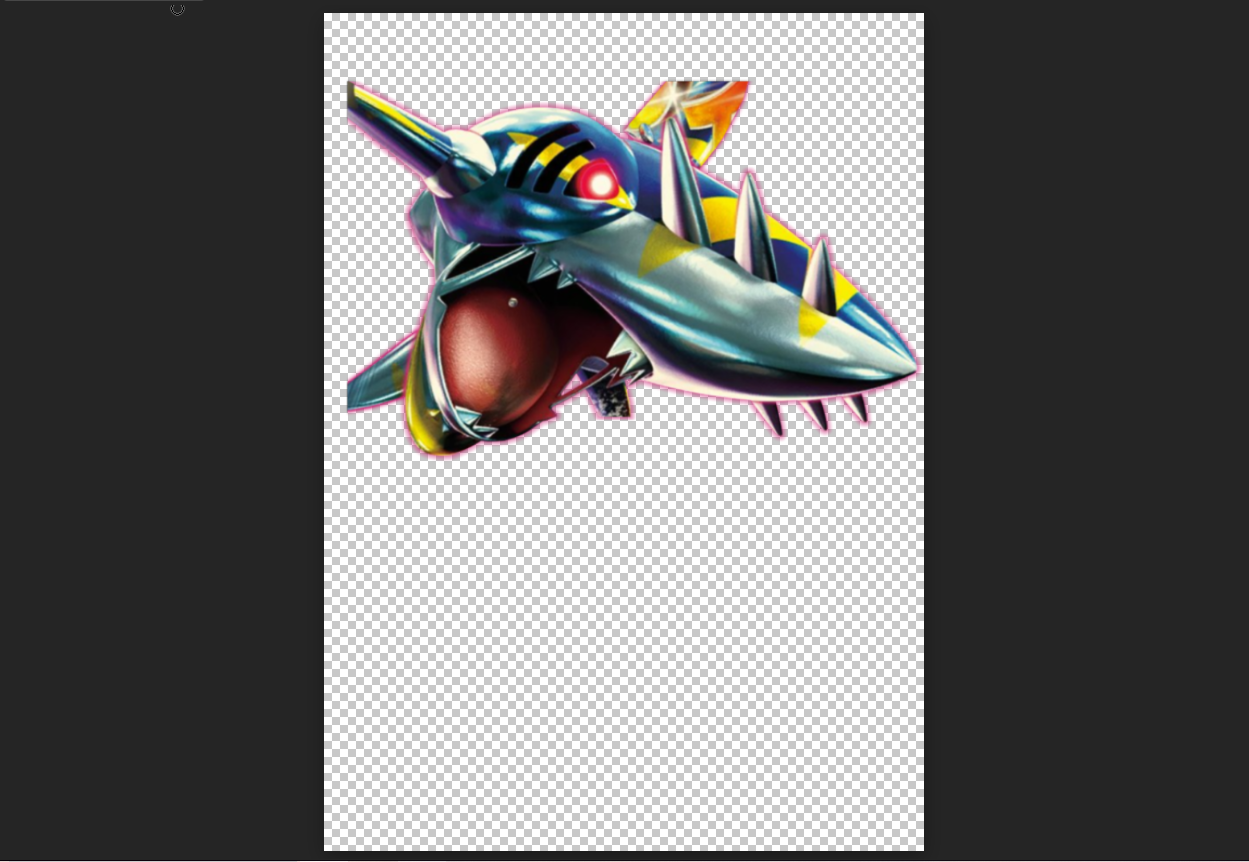
Image 1
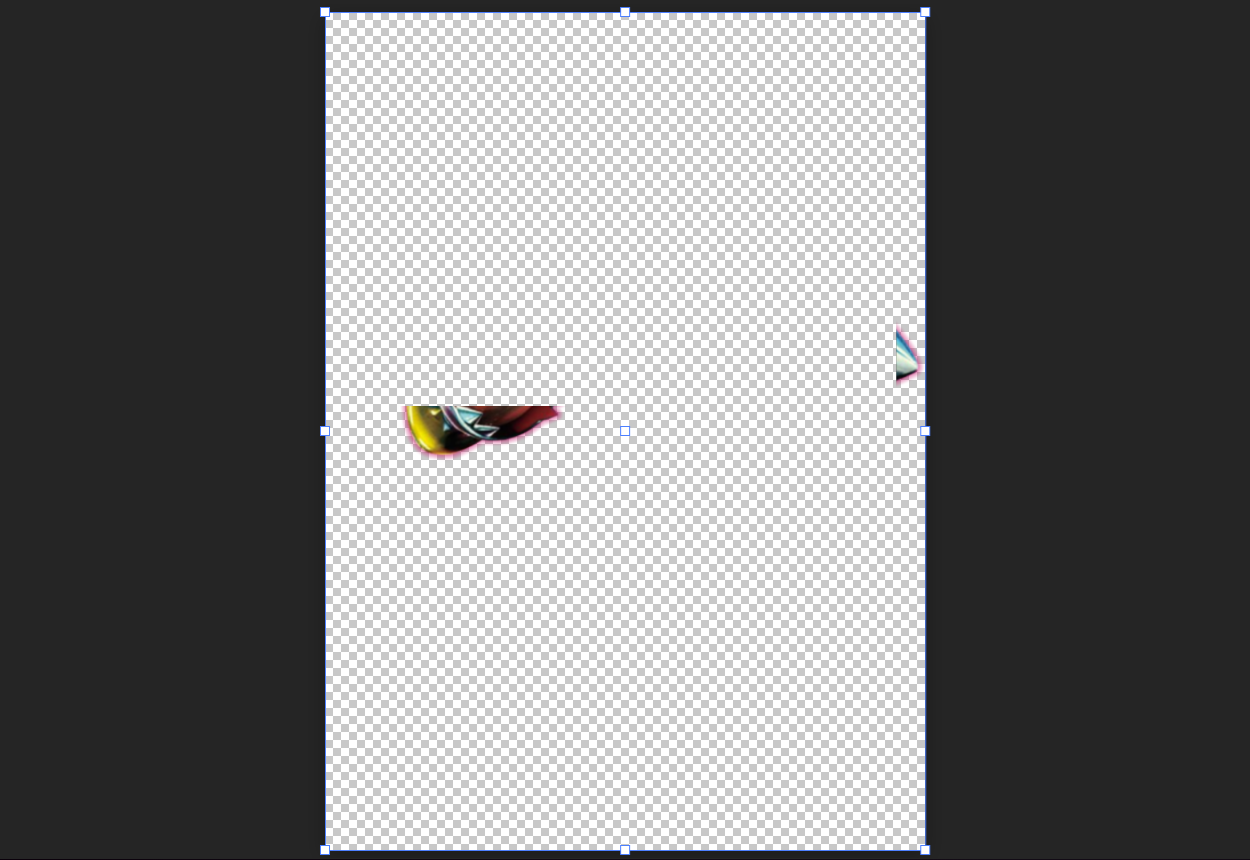
Image 2
Put the image of the cropped render (such as the one in image 2) into your photo editor of choice. Then, you'll want to use the rectangle crop tool from before to select a section. (See image 3)
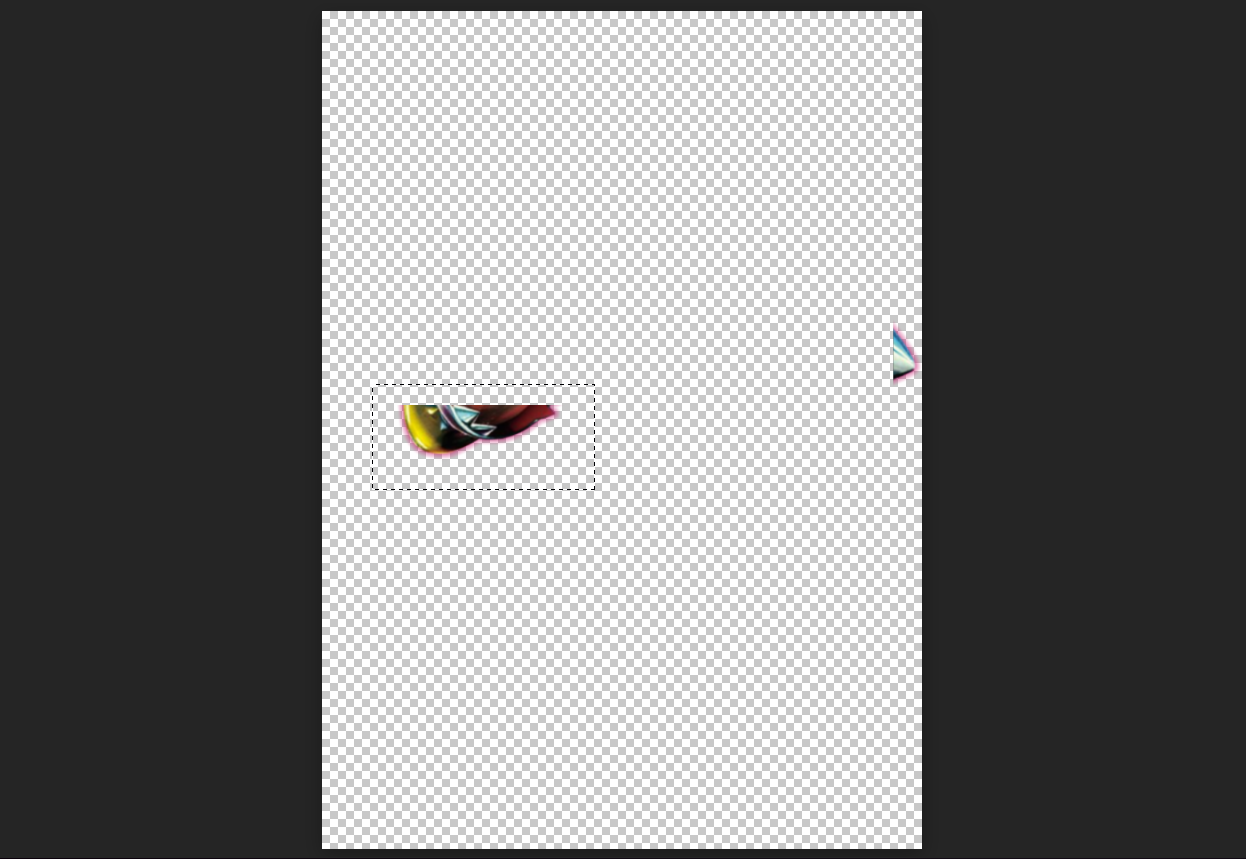
Image 3
Now, you'll want to right click the box, but select "Layer via Cut" this time instead of layer via copy. This will move the selected area to a new layer. (See image 4)
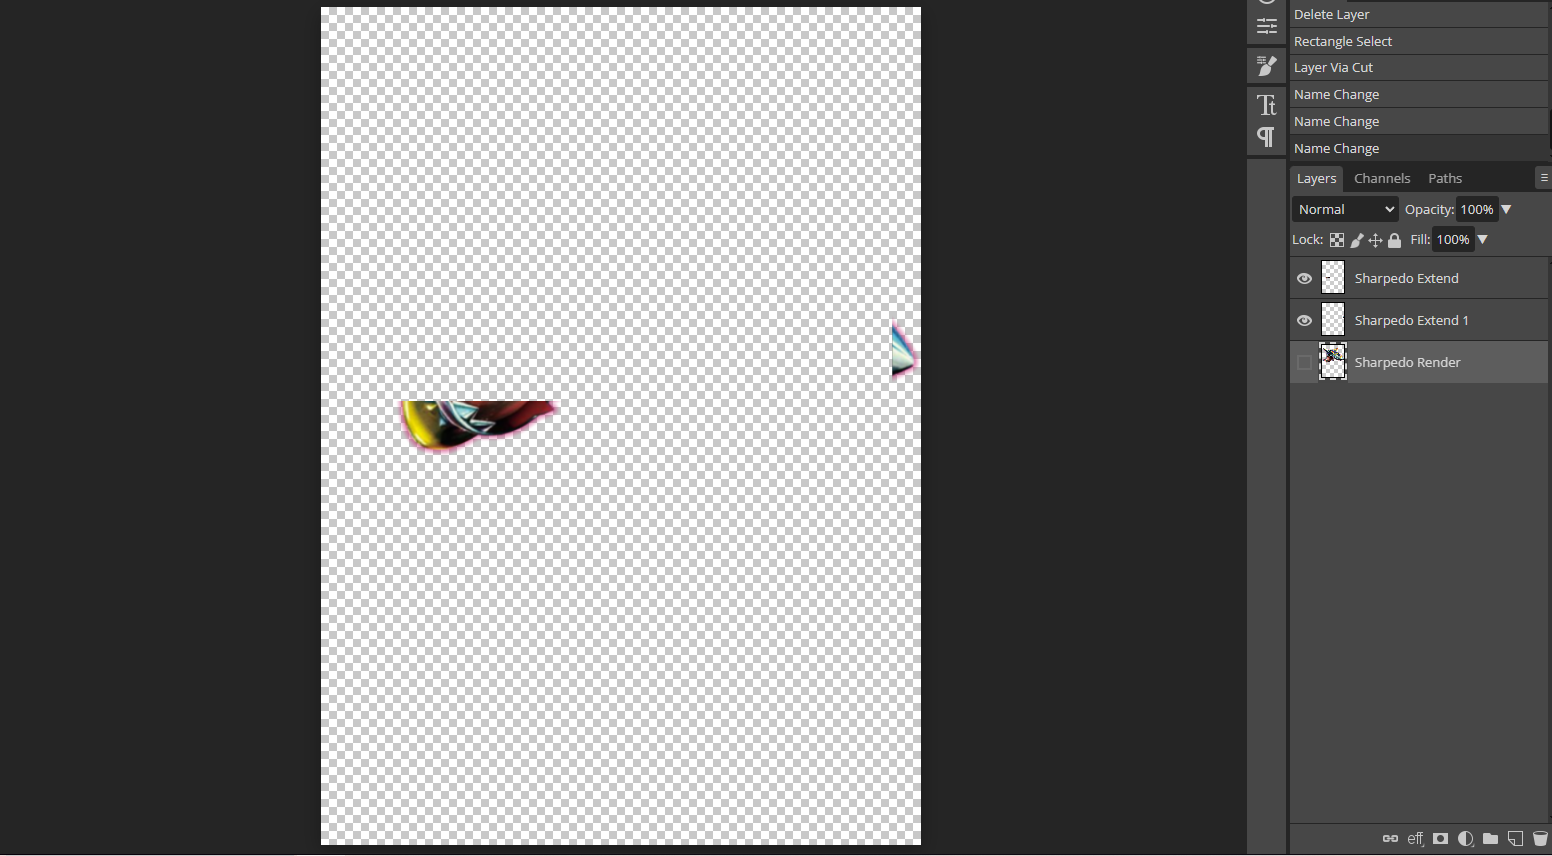
Image 4
You can now repeat this for each other part of the crop that needs to be separated from the others.
Next, right click one of the layers. You'll see a menu appear that gives a bunch of options. You'll want to select "blending options", then enable "Drop Shadow" by clicking on the checkbox. (See image 5)
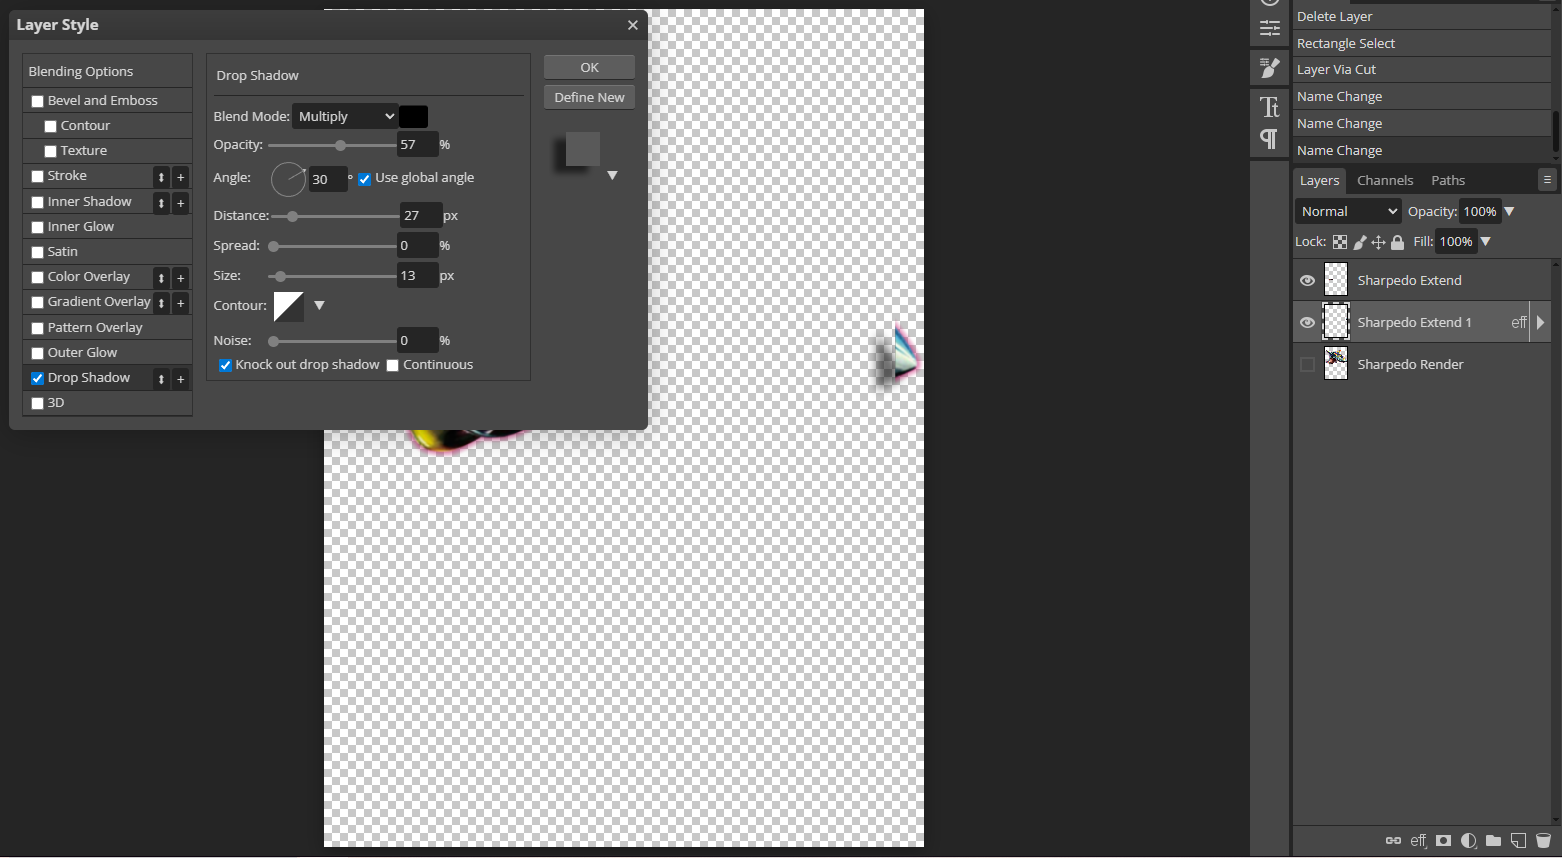
Image 5
Now, just play around with the options until you get what you like. Be sure to enable the base render's visibility when doing so, though. That way, you'll be able to see if the settings you choose cause the shadow to appear where you don't want it to. See images 6 and 7 for the settings I used for the shadows on Sharpedo's render.
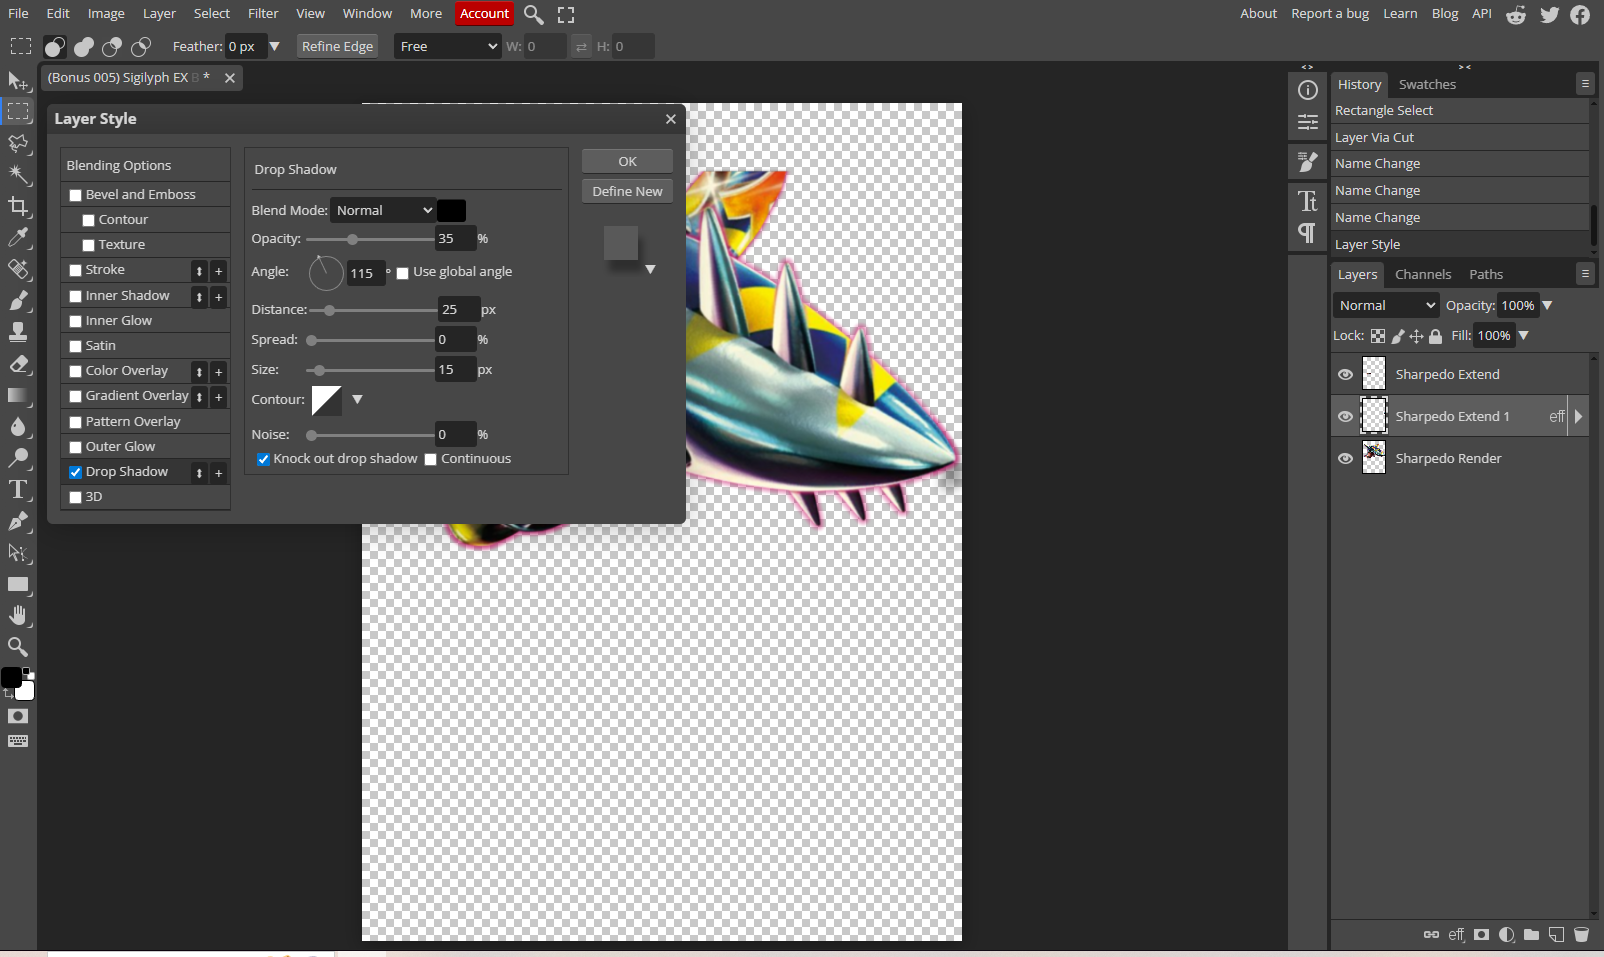
Image 6
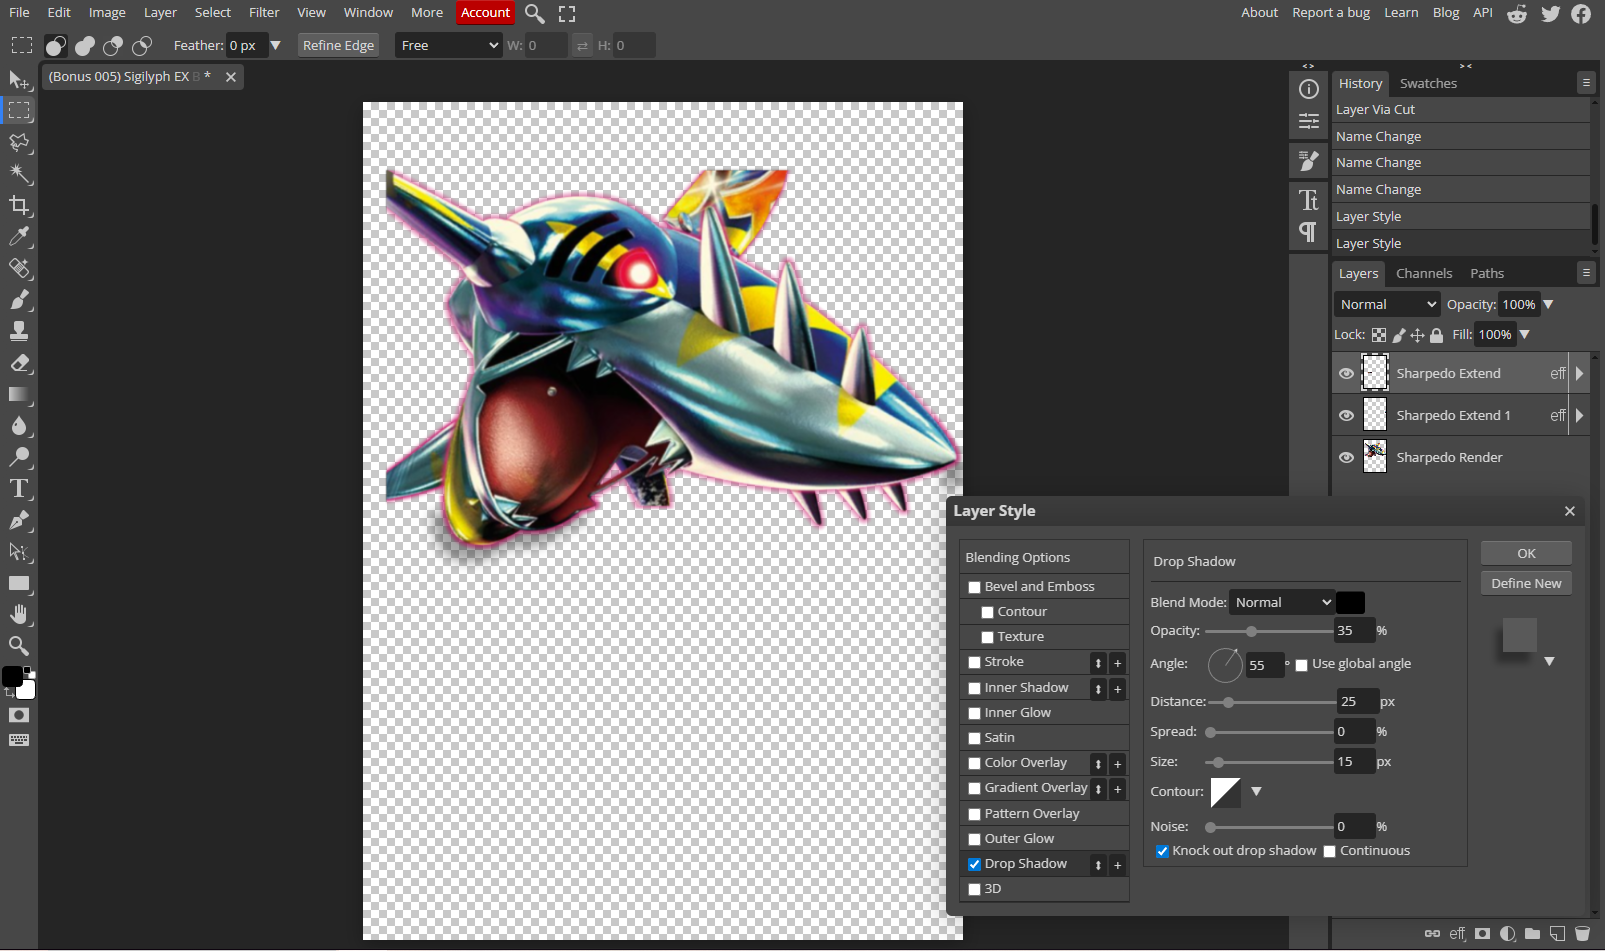
Image 7
Now, you'll just export the crop (with the base render not visible) just like you did in trick 1, and impliment the crop into pokecardmaker in the same way, too. By the end, you should have something that looks like the example in image 8.
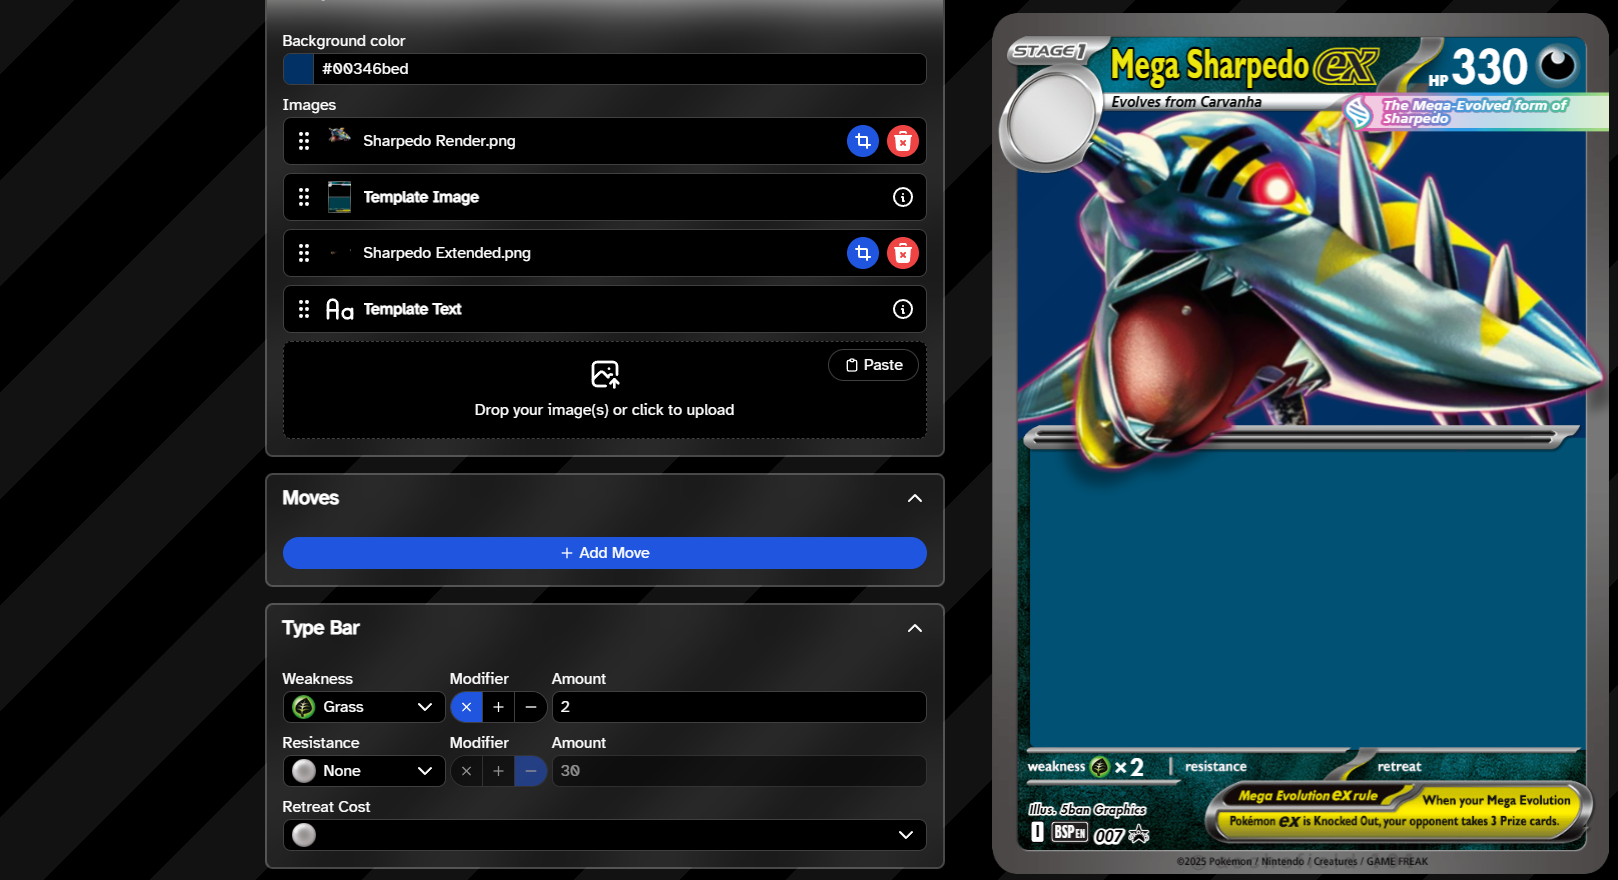
Image 8
Now, just like that, you've upped your visuals game by giving the card more depth!